Animation Steps
Creating the illusion of live movement
Please allow time for images to download completely. (9k-147k)
INTRODUCTION
Animation is usually created by collaboration of many people working
on just one part of this animation process. Some people will specialize in the animation, some
in cleaning up the animation, some in painting the backgrounds or drawing the layouts, and some
in just planning the scene so that all the elements come together correctly. For the purposes
of demonstrating this process, I will create a small scene (in live action film; a shot or clip)
where a character interacts with the background and with a prop.
 RUFF
RUFF
THE RUFF
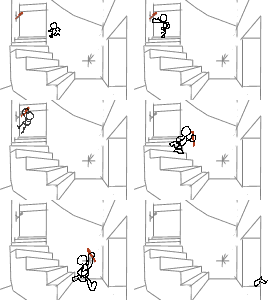
This first stage shows the background layout, the props and
characters in relation to each other. From here, we can see changes to be made to the
animation and we can identify the areas of the frame that are going to require special attention.
In this case, our hero is in a hurry to get a torch and run down some stairs and into a dark
tunnel. One special need of this scene is showing how the light from the torch will effect
the way the background and the character are lit throughout. Another special requirement is
when our hero enters through a doorway and exits through a tunnel, he should only show from
behind a wall. To solve the problem of revealing a character (or hiding him), we are going
to use mattes...
 MATTES
USING MATTES
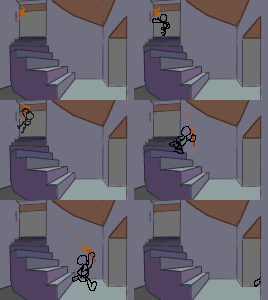
A matte is a portion of the frame. It can be any shape or size. The
matte is used to "cut" an image, or make a separate copy. Mattes can be layed back on top to
replace those portions of the image so as to create the illusion of depth. In our case, the
hero should look as if he runs in from behind a wall. The wall will actually be painted as
part of the background image. If we made a copy of the wall area of the background, we can
place that wall matte on top of the hero when he is supposed to appear behind it. This
introduces the idea of using new layers to compose more complex illusions within the frame.
By "cutting a matte" of the wall up at the top of the stairs and one for the tunnel on the very
far right, we can have them placed over the character and the torch when they are supposed to
appear behind them. When our hero runs down the stairs, however, the character layer should
appear in front of that wall, so I will remove the wall matte after he enters scene. Now, we
will tackle the next problem: how to show the light of the torch moving throughout the scene...
 EFX
EFX
SPECIAL EFFECTS (EFX)
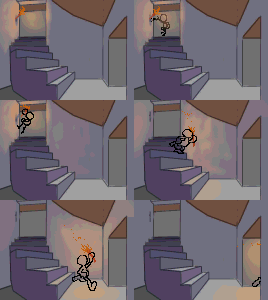
In this scene, the torch sits in place on the wall until it is snatched
by our bounding hero. Then, the torch is carried down the stairs and into the tunnel. The
background image includes the stairs, walls and the light from outside, but it cannot include
the light from the torch. The light from the torch, like the fire on the torch, will have to
be animated. We give the appearance of cast torchlight moving within the background by the use
of new lighting effects layers. In new layers we can create the extra light cast by the torch.
For this scene, I created four images of just the yellow torchlight as it would look as if it
were cast by the torch in the four general areas the torch is in: 1) the top of the stairs,
mounted to the wall, 2) about half way down the stairs, 3) at the bottom of the stairs, and 4)
inside the tunnel. I can fade these four layers up and down in succession to give the illusion
that the torchlight is moving. I can also make the light flicker by fading the layers up and
down a little throughout. After making this pass, I realized that one matte (the tunnel matte)
is visible to us when the torchlight effects layer is on. Look at the end of the scene, just
before he exits into the tunnel. The matte of that wall is over the character, torch and fire,
however, it should not appear to be over the torchlight effect. It looks ugly. Now, if we
place the torchlight layer over the matte, it will be over the character. Since we can't have
the character covered over by the torchlight, we have a catch-22. But, I came up with a simple
solution: I leave the tunnel matte off through the scene until the very end, when the torch
(and the character) enters the tunnel. At that point, I turn on the matte while fading down
the third torchlight layer drastically. It's not a perfect solution, but it looks better.
Another solution would have been to create another layer of just the yellow torchlight cast on
just that tunnel matte. Then, we would have to match the torchlight fade of two mattes when we
shoot.
 CLEANUP
CLEANUP (CU)
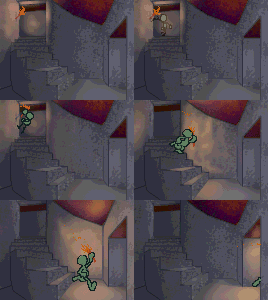
Now that the biggest and most obvious problems of the scene have been
solved, we can go back to the background image and paint it. This is where we can pay
attention to the details and really paint a good looking scene. This means using good sense of
color, texture, and lighting (but we will remember to omit the torchlight). And, after the
background looks the way we want it, we will have to remember to "recut the mattes" from the new
background image. I have also cleaned up the character animation and the torch animation as
well. And I've added new color layers (one for each frame of character outline) and placed
them under the character outline. By adding new layers instead of painting the outline layer
to add the color of the character, I am able to go back and change the color without changing
the outline.
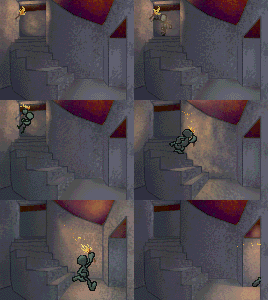 FINAL
FINAL
FINAL SCENE
To finish up this scene, I'm going to touch up the lighting effects of
the torchlight so that it shows the more of the wall texture is casts on. Next, I'm going to
add tones, or shadows on the character's color layers, to show the effect of the torchlight on
our hero's body as he runs through the scene. I've also painted the torch fire and cut a
matte of the torch when our hero holds it in front of him (the rest of the time, the torch
layer is under the character layer). Calling this final is really just saying, "I'm done
working on it.". Because, we can always find more to do to the scene to help the illusion.
We can retouch the background or the effects. We can add a new layer for the contact shadow:
the shadow cast from the character onto the floor and walls of the scene. We could add a
costume for our hero. We can add new characters or props. We could go on and on. The more
steps you add to an animated film, the more you (and the audience) get out of it.
Copyright 2000 by Glenn Storm and Hanging By A Thread Productions
To the Flash Gallery page
To the GIF Gallery page
Back to Main


